Designers draw for the same reason writers keep notes. A pencil is the fastest way to find out whether an idea works, and drawing from life is the best training there is for the eye that judges everything else a designer makes. Milton Glaser sketched the first I ♥ NY en.wikipedia.org in the back of a taxi in 1976, and the scrap of paper is now in the collection of the Museum of Modern Art in New York; in 2008 he published a book of his drawings called Drawing Is Thinking. Nobody needs to become an illustrator. What drawing teaches is how to see sizes, angles and spaces as they really are, which is the same skill that notices a logo sitting two points too high.
Most drawings that look wrong are proportionally wrong rather than badly rendered, and is measurable rather than intuitive. A head slightly too big for its body, or a bottle's neck slightly too long, makes the whole drawing look off however lovely the shading is. No amount of finish repairs it. The traditional method is to pick one in the subject, such as the head or the width of a jar, and express everything else in terms of it. Art teachers often give an adult standing figure as about seven and a half heads tall, and a teapot might turn out to be one and a half of its own widths high. Because you are copying ratios, the drawing can then be any size you like.
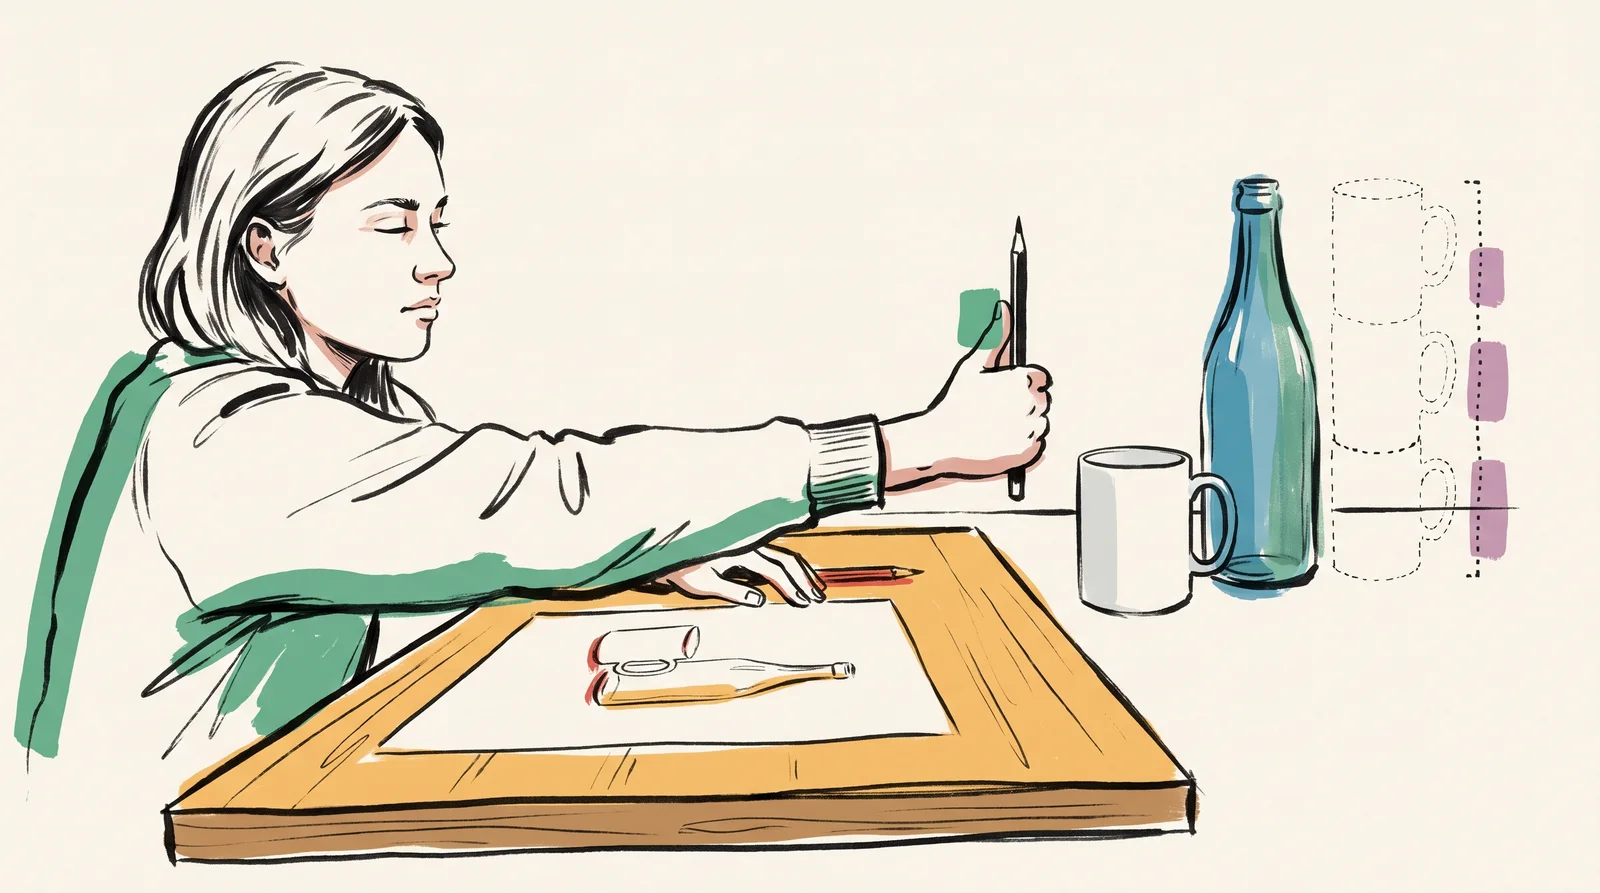
Holding a pencil at arm's length with a locked elbow is the classic technique, and it works because it keeps the measuring distance constant. Change the arm length and every measurement changes with it. Close one eye, because with both open the pencil doubles, then line its tip up with the top of your unit and slide your thumb down to the bottom. You now have a length you can carry across the subject to count how many times it fits. The pencil measures angles too. Tilt it to lie along the edge of a roof or the slope of a shoulder, keep that tilt, and bring it down to the paper.
There are two ways of doing this, and they disagree usefully. In sight-size en.wikipedia.org, the drawing board stands beside the subject and the artist steps back to a marked spot, from where the drawing is made exactly the size the subject appears, so the two can be compared side by side. The French portrait painter Carolus-Duran worked this way, his pupil John Singer Sargent took the method to Britain and America, and some ateliers still teach it. lets the drawing be any size and relies on ratios checked with the eye and the pencil. is easier to check. Comparative is what you will use in a sketchbook, a meeting or a life class with no room to step back.
Whichever you use, the order matters. Block in the outer limits first with a few straight lines through the highest, lowest and outermost points, and get those right before drawing anything inside them. Then check with plumb lines and horizontals, holding the pencil vertically to see what sits directly above what, and level to see what aligns across. Measure the gaps as well as the objects. are easier to judge accurately because the mind has no expectations about them, so comparing the space between two chair legs is more reliable than comparing the legs. Betty Edwards built a good part of her 1979 book, Drawing on the Right Side of the Brain, around exercises of exactly this kind.
Measuring exists because the mind draws what it expects rather than what is there. The head is the classic case. In most adult heads the eyes sit roughly halfway between the top of the skull and the chin, and almost every beginner puts them much higher, because the forehead and the hair feel like less of the face than they are. A mug seen from above goes wrong the same way, since the mind knows its rim is a circle and draws the ellipse too round. Measuring is how you catch the expectation before it reaches the paper.
Worked example
Measure a mug, a bottle and the gap between them
- 01Put a mug and a bottle on a table about two metres away, lit from one side, and sit where you can see both without moving your head.A fixed position is the whole method. Move your chair and every measurement you have taken is wrong.
- 02Choose the mug's height as your unit. Hold a pencil at arm's length with your elbow locked and one eye closed, and mark the mug's height with your thumb.The locked elbow keeps the distance constant, and the closed eye stops the pencil doubling.
- 03Carry that unit across the scene. Write down how many mug-heights tall the bottle is, and how many mug-heights wide the whole group is.A ratio can be drawn at any size, which is why you measure relationships instead of lengths.
- 04Block in the whole group with four to six straight lines through its highest, lowest and outermost points.Placing the outer limits first means every later mistake is a small one.
- 05Hold the pencil upright, then level, and note what lines up with what, such as the mug's handle against the bottle's shoulder.Plumb and level checks catch errors a ratio misses, and they take seconds.
- 06Draw the shape of the gap between the two objects before you draw either outline.The gap is a shape you have no expectations about, so you draw what is there.
- 07Measure again, then add the ellipses of the rims and bases, checking the depth of each against its width.An ellipse drawn from memory is almost always too round.
- 08Photograph the scene and your drawing, flip both photographs, and compare them side by side.A mirrored view breaks your familiarity with the drawing, and the errors show at once.
The words, in plain language
- Proportion
- The size of one part measured against another. What most wrong-looking drawings get wrong.
- Unit
- One part of the subject chosen to measure everything else by, such as the height of a head.
- Sight-size
- Drawing at the size the subject appears from a fixed position.
- Comparative measurement
- Judging everything against one chosen unit in the subject.
- Plumb and level
- Checking what lines up vertically and horizontally. The fastest correction there is.
- Negative shape
- The space between and around things. Easier to judge, because the mind has no fixed idea of it.
- Block-in
- The first few straight lines that fix the outer limits of a subject, drawn before any detail.
Why it matters
The skill transfers directly into design. Judging whether one element is twice the size of another, whether two edges truly align, and whether a curve is symmetrical is the same faculty, and it is why designers who draw tend to catch things in a layout that others need a ruler to find. It also teaches the opposite lesson. Sometimes the eye and the ruler disagree, and the eye should win: type designers make round letters such as O slightly taller than flat ones such as H, because a circle drawn to exactly the same height looks smaller. Knowing when to trust a measurement and when to correct it for the eye is much of what separates a careful layout from a merely correct one.
The commonest mistake is starting with detail. An eye drawn beautifully in the wrong place has to be rubbed out along with the hour spent on it, and the drawing that began with a careful eyelash is usually the one with a head too small for its body. The second mistake is measuring once. A check made at the start does not protect you from the drift that creeps in over forty minutes, so people who draw well measure again whenever they add something big. The third is measuring with a bent arm, which gives a different answer every time you move.
Measuring feels slow and mechanical at first. With practice, most of the checks start to happen without the pencil, because your eye learns where it usually goes wrong and looks there first. That trained eye is the real gain, and you bring it to every layout, crop and logo you judge afterwards.
The module builds on measuring. It moves on to light and shadow, and to how a material shows itself by what it does to light, then to still life and life drawing, where the measuring gets harder, and to gesture, which is drawing the action of a pose before its outline. Next come the quick sketches designers make to think, and the thumbnails that grow out of them. Then the drawings made to be built from: orthographic projection and the conventions of technical drawing. After that it covers drawing from memory and line quality, and it ends with perspective and isometric projection.
Elsewhere
- Type
- term
- Period
- ongoing